AI image generator from image example
Free AI Image Enhancer Example
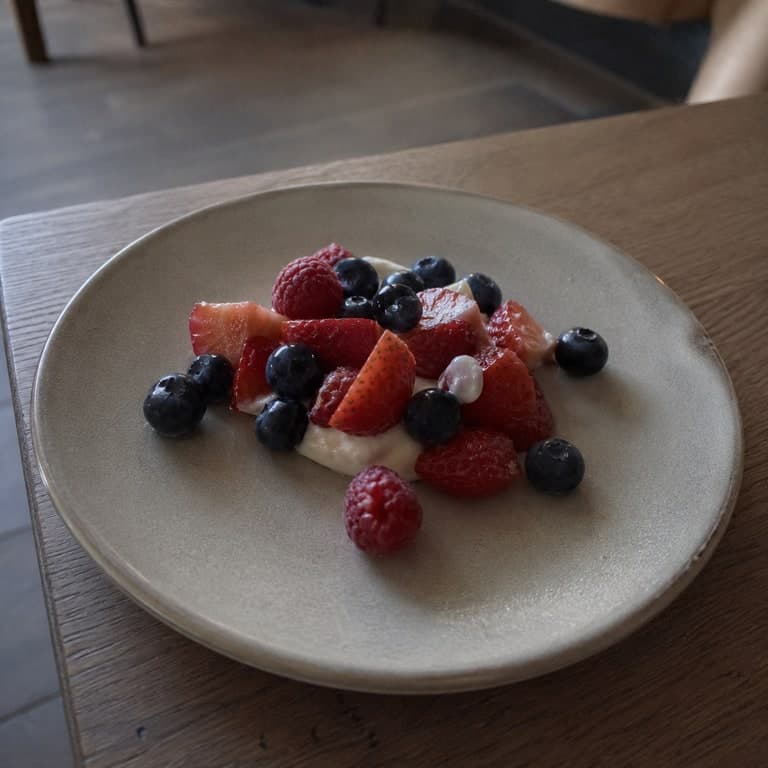
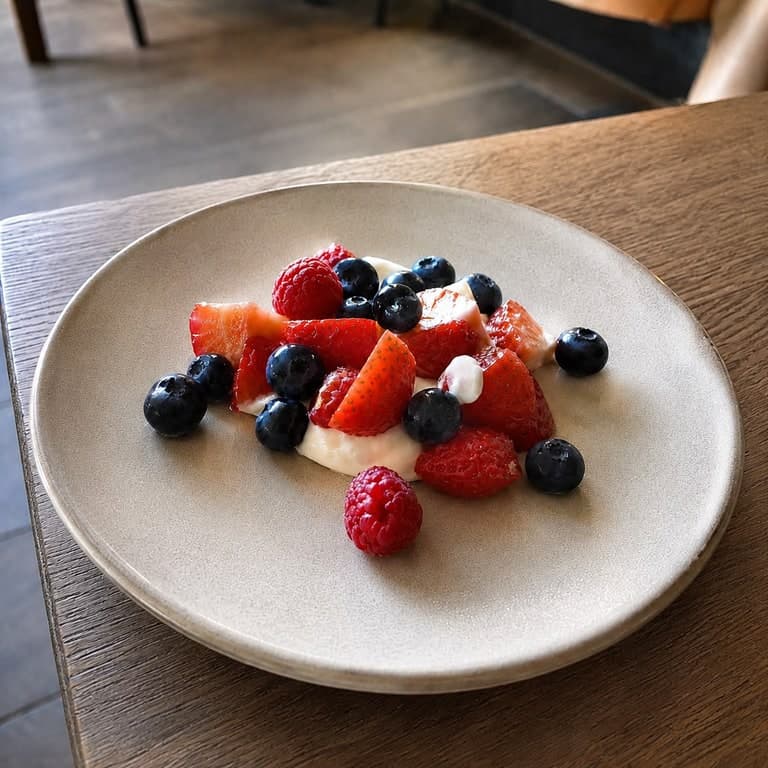
Clean up a dim cafe snapshot into a sharper, brighter image while keeping the result realistic and close to the source.
Workflow Notes
Creators and small businesses improving ordinary phone photos before publishing or sharing them.
Improves clarity, exposure, and texture without turning the image into a different scene.
Start with a clear source image so the subject and layout are easy to preserve.
Use prompts to control the image enhancer direction without changing the core subject too aggressively.
Create several versions, then use higher-resolution exports when the final image is ready for delivery.
How to recreate this result
This example page is built as a reusable tutorial, not just a before/after image. Start from a source image with a similar structure, borrow the prompt pattern, then open the matching workflow hub for deeper guidance.
Step 1
Match the source structure
Start with a source image that has a similar subject, crop, and composition to this image enhancer example.
Step 2
Reuse the prompt pattern
Keep the parts that describe style, lighting, and preservation rules, then replace the subject details with your own image context.
Step 3
Generate and compare
Judge the result against the original source image, not in isolation. The best output keeps the important structure anchored.
Step 4
Save the final version
Download the sample, save to your gallery, submit a strong result as a public example, or upgrade when you need plan-gated exports.
Best source image for this workflow
This example works best when the uploaded source already contains the subject, composition, and rough visual direction you want the AI to preserve.
Prompt settings used
Mode
Image enhancer
Output goal
Improves clarity, exposure, and texture without turning the image into a different scene.
Prompt control
The prompt names style, lighting, composition rules, and what should not appear in the image.
Export path
Start with a standard test, then use 2K or 4K-class export only when your active plan supports it.
Common mistakes to avoid
- Using a source image that does not match the free ai image enhancer example goal.
- Writing a prompt that asks for too many unrelated changes at once.
- Judging only the result image without comparing it against the source composition.
Prompt Used
Enhance this cafe dessert photo into a cleaner, sharper image. Improve exposure, texture, color balance, and appetizing detail while keeping it realistic and close to the source. No text, no logo, no watermark.
Try this promptFAQ
Can I recreate this image enhancer workflow?
Yes. Upload a similar source image, use the prompt direction shown on this page, and adjust the wording for your own brand, product, or scene.
Will the generated image stay close to my source image?
Image-to-image generation is designed to keep the main subject and composition recognizable, but stronger prompts can change styling, background, and details more noticeably.